Step five: Configure the default hole punch location
1.
From the Home screen on the product control panel, scroll to and touch the
Administration
button.
2.
Open the following menus:
44
Chapter 2 Install and configure the finishing accessories
ENWW
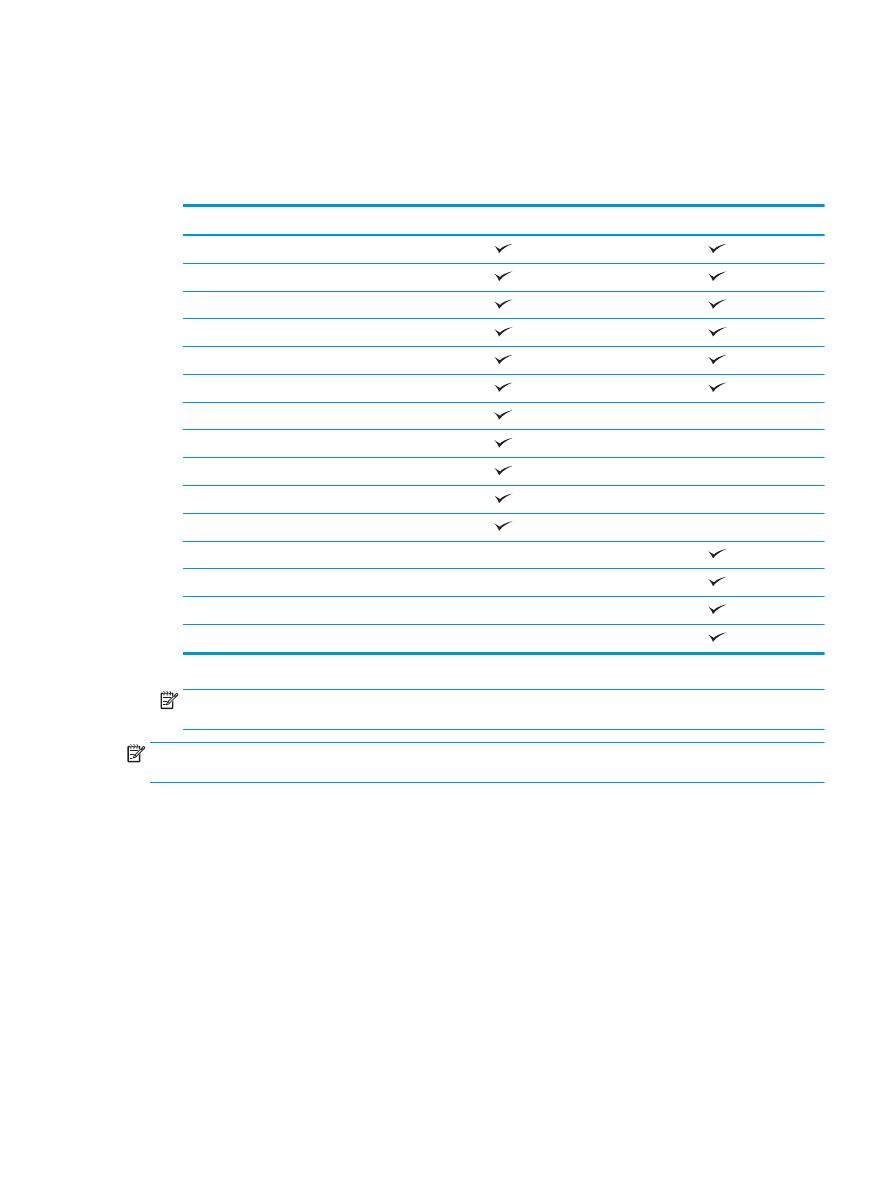
●
Stapler/Stacker Settings
●
Hole Punching
3.
Select a hole punch location from the list of options, and then touch the
Save
button. The following hole
punch options are available for either a 2/3 Hole Puncher or 2/4 Hole Puncher:
Hole punch location
2/3 Hole Puncher
2/4 Hole Puncher
None
Two left or top
Two left
Two right
Two top
Two bottom
Three left
Three top
Three right
Three top
Three left or top
Four left
Four right
Four top
Four left or top
NOTE:
Not all options are available. Available options depend on whether the hole punch accessory is
a 2/3 or 2/4 hole puncher.
NOTE:
To use the hole puncher, load Letter or A4-size paper with the long edge of the paper along the right
edge of the tray (long-edge feed).